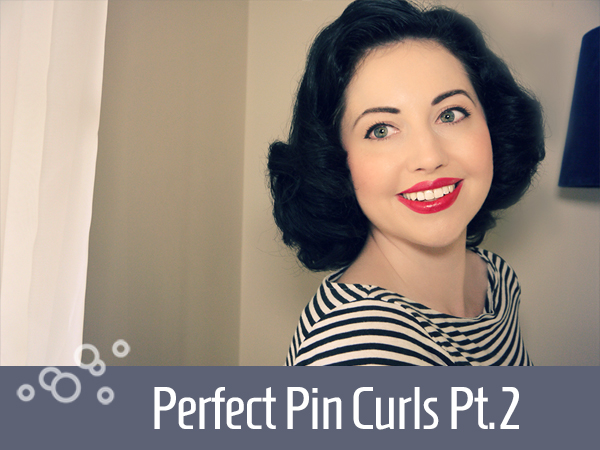
It was quite a while ago that I had the Perfect Pin Curls part one for you, then I somehow went ahead and lost the footage to part two! Never mind though, it gave me the perfect excuse to film a little something in the powder room at the White Swan Inn last week for you.
For those trying pin curls for the first few times, this is the stage you reach all full of hope the next morning, only to be a tad miffed when confronted with a huge mop of curls. What to do now? How do you tame these and turn them into those lovely waves or 40’s curls you so envy? It is far simpler than it seems and only takes a very short amount of time. The setting you did the night before was the hard work, now it is time to put the finishing touches on your creation.
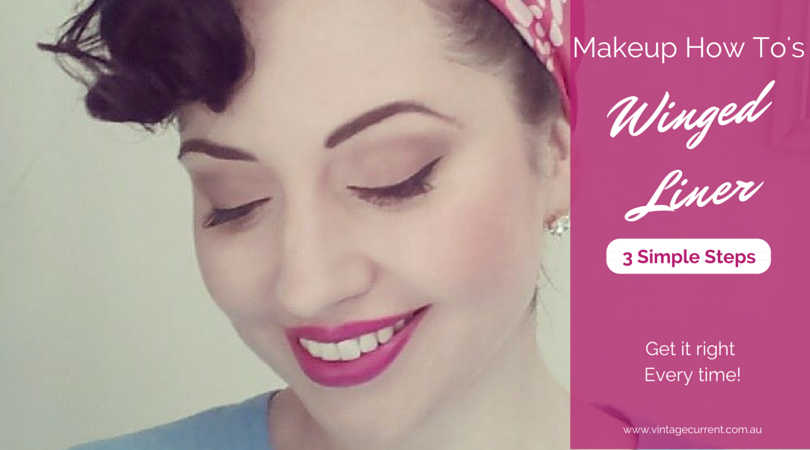
You want to know how to do winged liner perfectly every time?
You need a specialty winged eyeliner tutorial and here it is!
I’ve been asked more times than I can count, to show you how I do my winged eyeliner. It is, without fail, the first thing I’m asked in all my workshops and I love to see the difference it makes to people when they get it. Aside from the drawing technique, the biggest tip I can offer you, is how I manage to keep my lids flat (the head tilt) and still see what I’m doing.
Watch it. Try it. Share it!
For all natural, cruelty free liquid eye liner, we shop with Nourished Life here in Australia. They have a gorgeous range of makeup for the conscious consumer and incredible customer service too!
I’ve been shopping again and came up with 3 fab and cheap beauty finds! Here in Australia we know that our beauty products are significantly more expensive than the rest of the world, so I’m always on the look out for effective and inexpensive alternatives to share with you.
Today I’m back on my video game, and have three fantastic finds to share with you. Some you may have heard of before and some that may surprise you!
Just which product gave me this incredibly quick and effective look? Find out in today’s video episode.
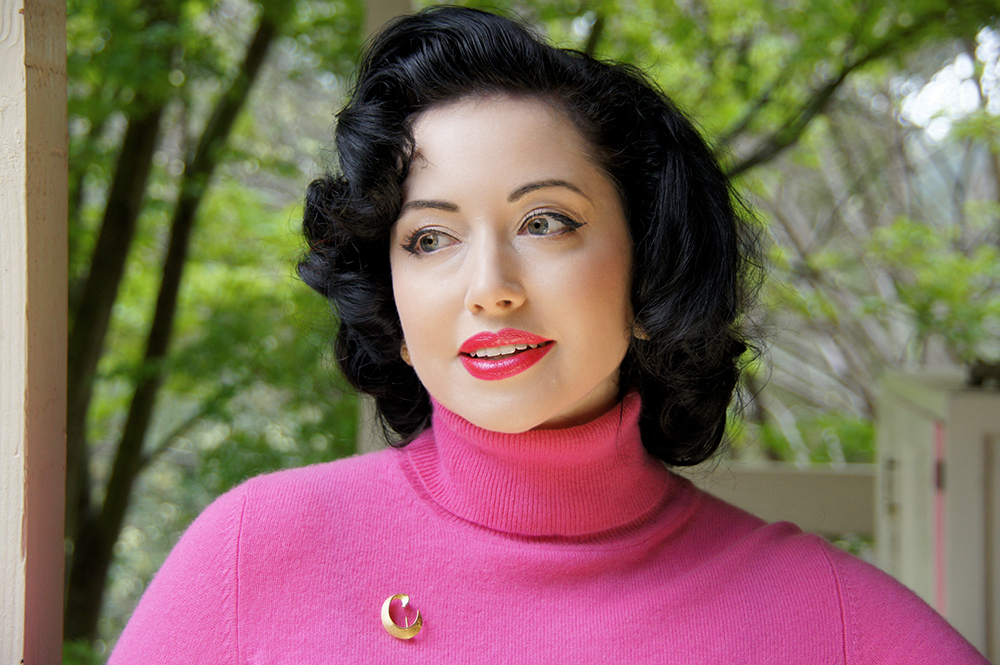
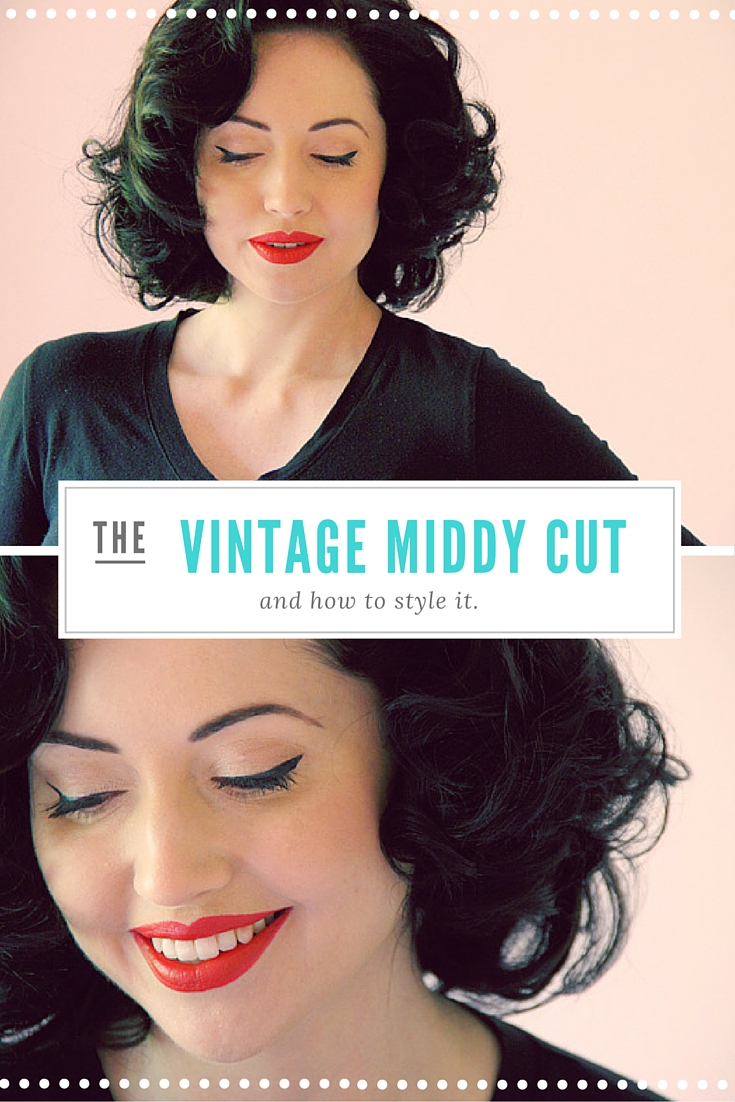
There is so much talk on the vintage pages of the internet about “what is the perfect hair cut for vintage“? While there is no single answer, given we all have preferences for different eras, different hair types and different lifestyles; the most often recommended style is The Middy Cut. There are original cutting diagrams floating around of these, and so many of you will have already taken these to your hairdressers, often with disappointing results. You can read more in last week’s post about my new 1950’s Middy hair cut here.
In the wake of showing you those photos and telling my story, I’ve received a flood of messages from ladies wanting to get the same hair cut. I have sent my hairdressers details to a number of you in Melbourne, but it must come with a word of warning. This is NOT a wash and wear hair cut. You must be committed to styling it every day. This isn’t necessarily time consuming, but you need to have the skills to do it. In fact, it takes me about ten minutes each evening to roll this up, then about five or less in the morning to style it. And so, today’s tutorial is designed to help set you on the right path and show you how I style my Middy Cut with a simple pin curl set.
This set is all rolled in a downwards direction from the centre part and takes about 2-3 hours to set, or even better, can be done over night. The key to this style is knowing how to do a good comb out. You’ll see how with the same pin curl set I’ve achieved quite a variety of looks, from the soft and sexy, to the sleek and classic.
Please feel free to ask me comments on the video (so everyone can benefit from seeing the answers there) and make sure to share this tutorial as it is one of the keys to success in understanding why Middy Cuts and vintage styling isn’t just a one step solution.
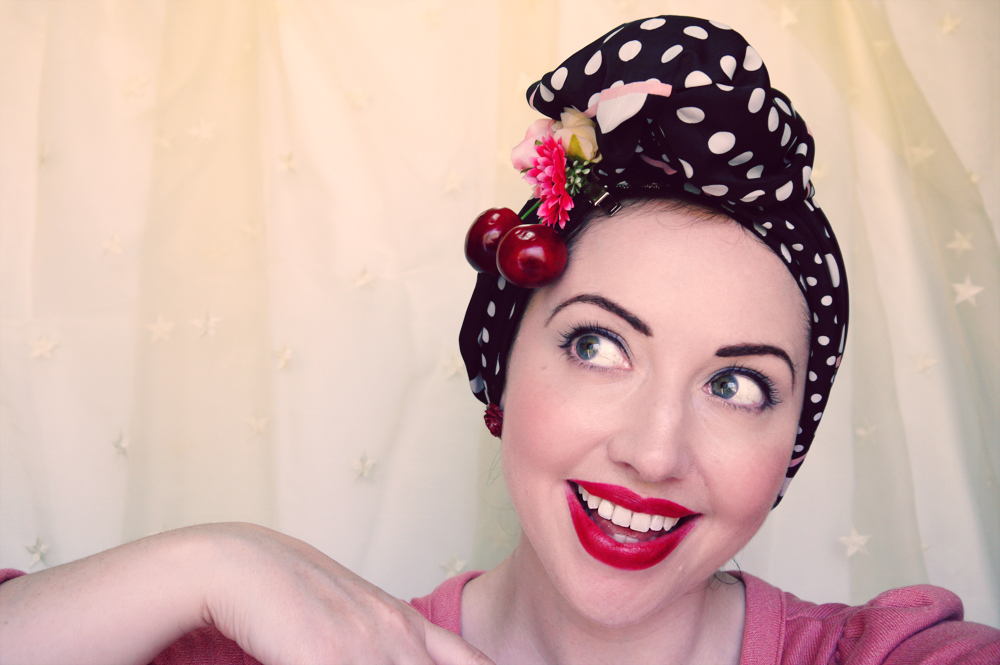
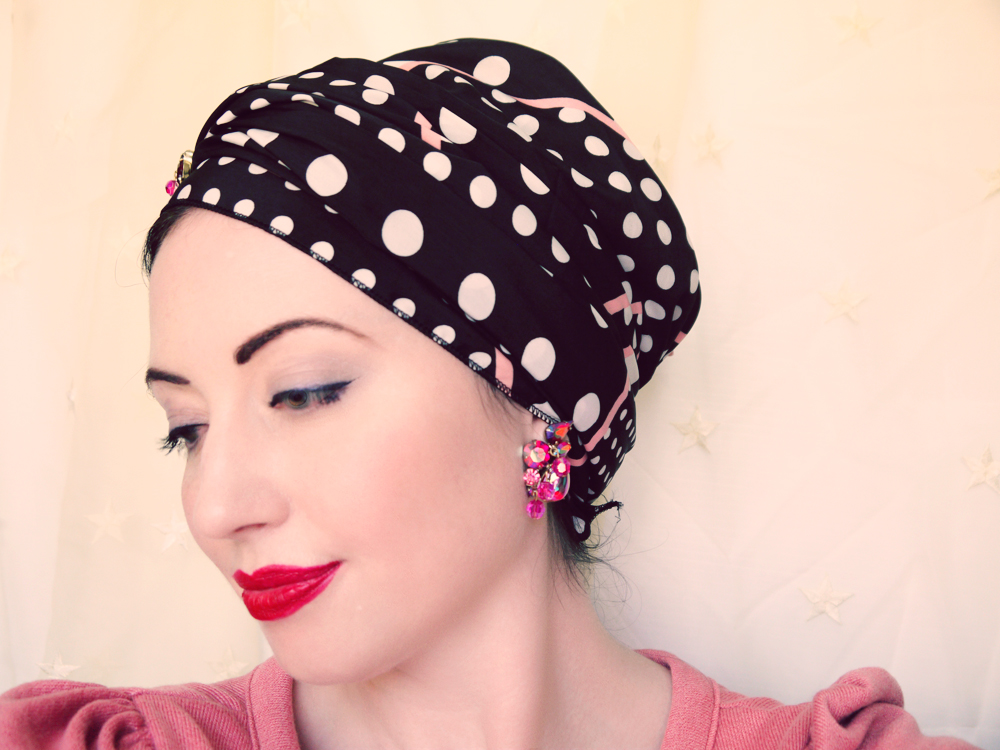
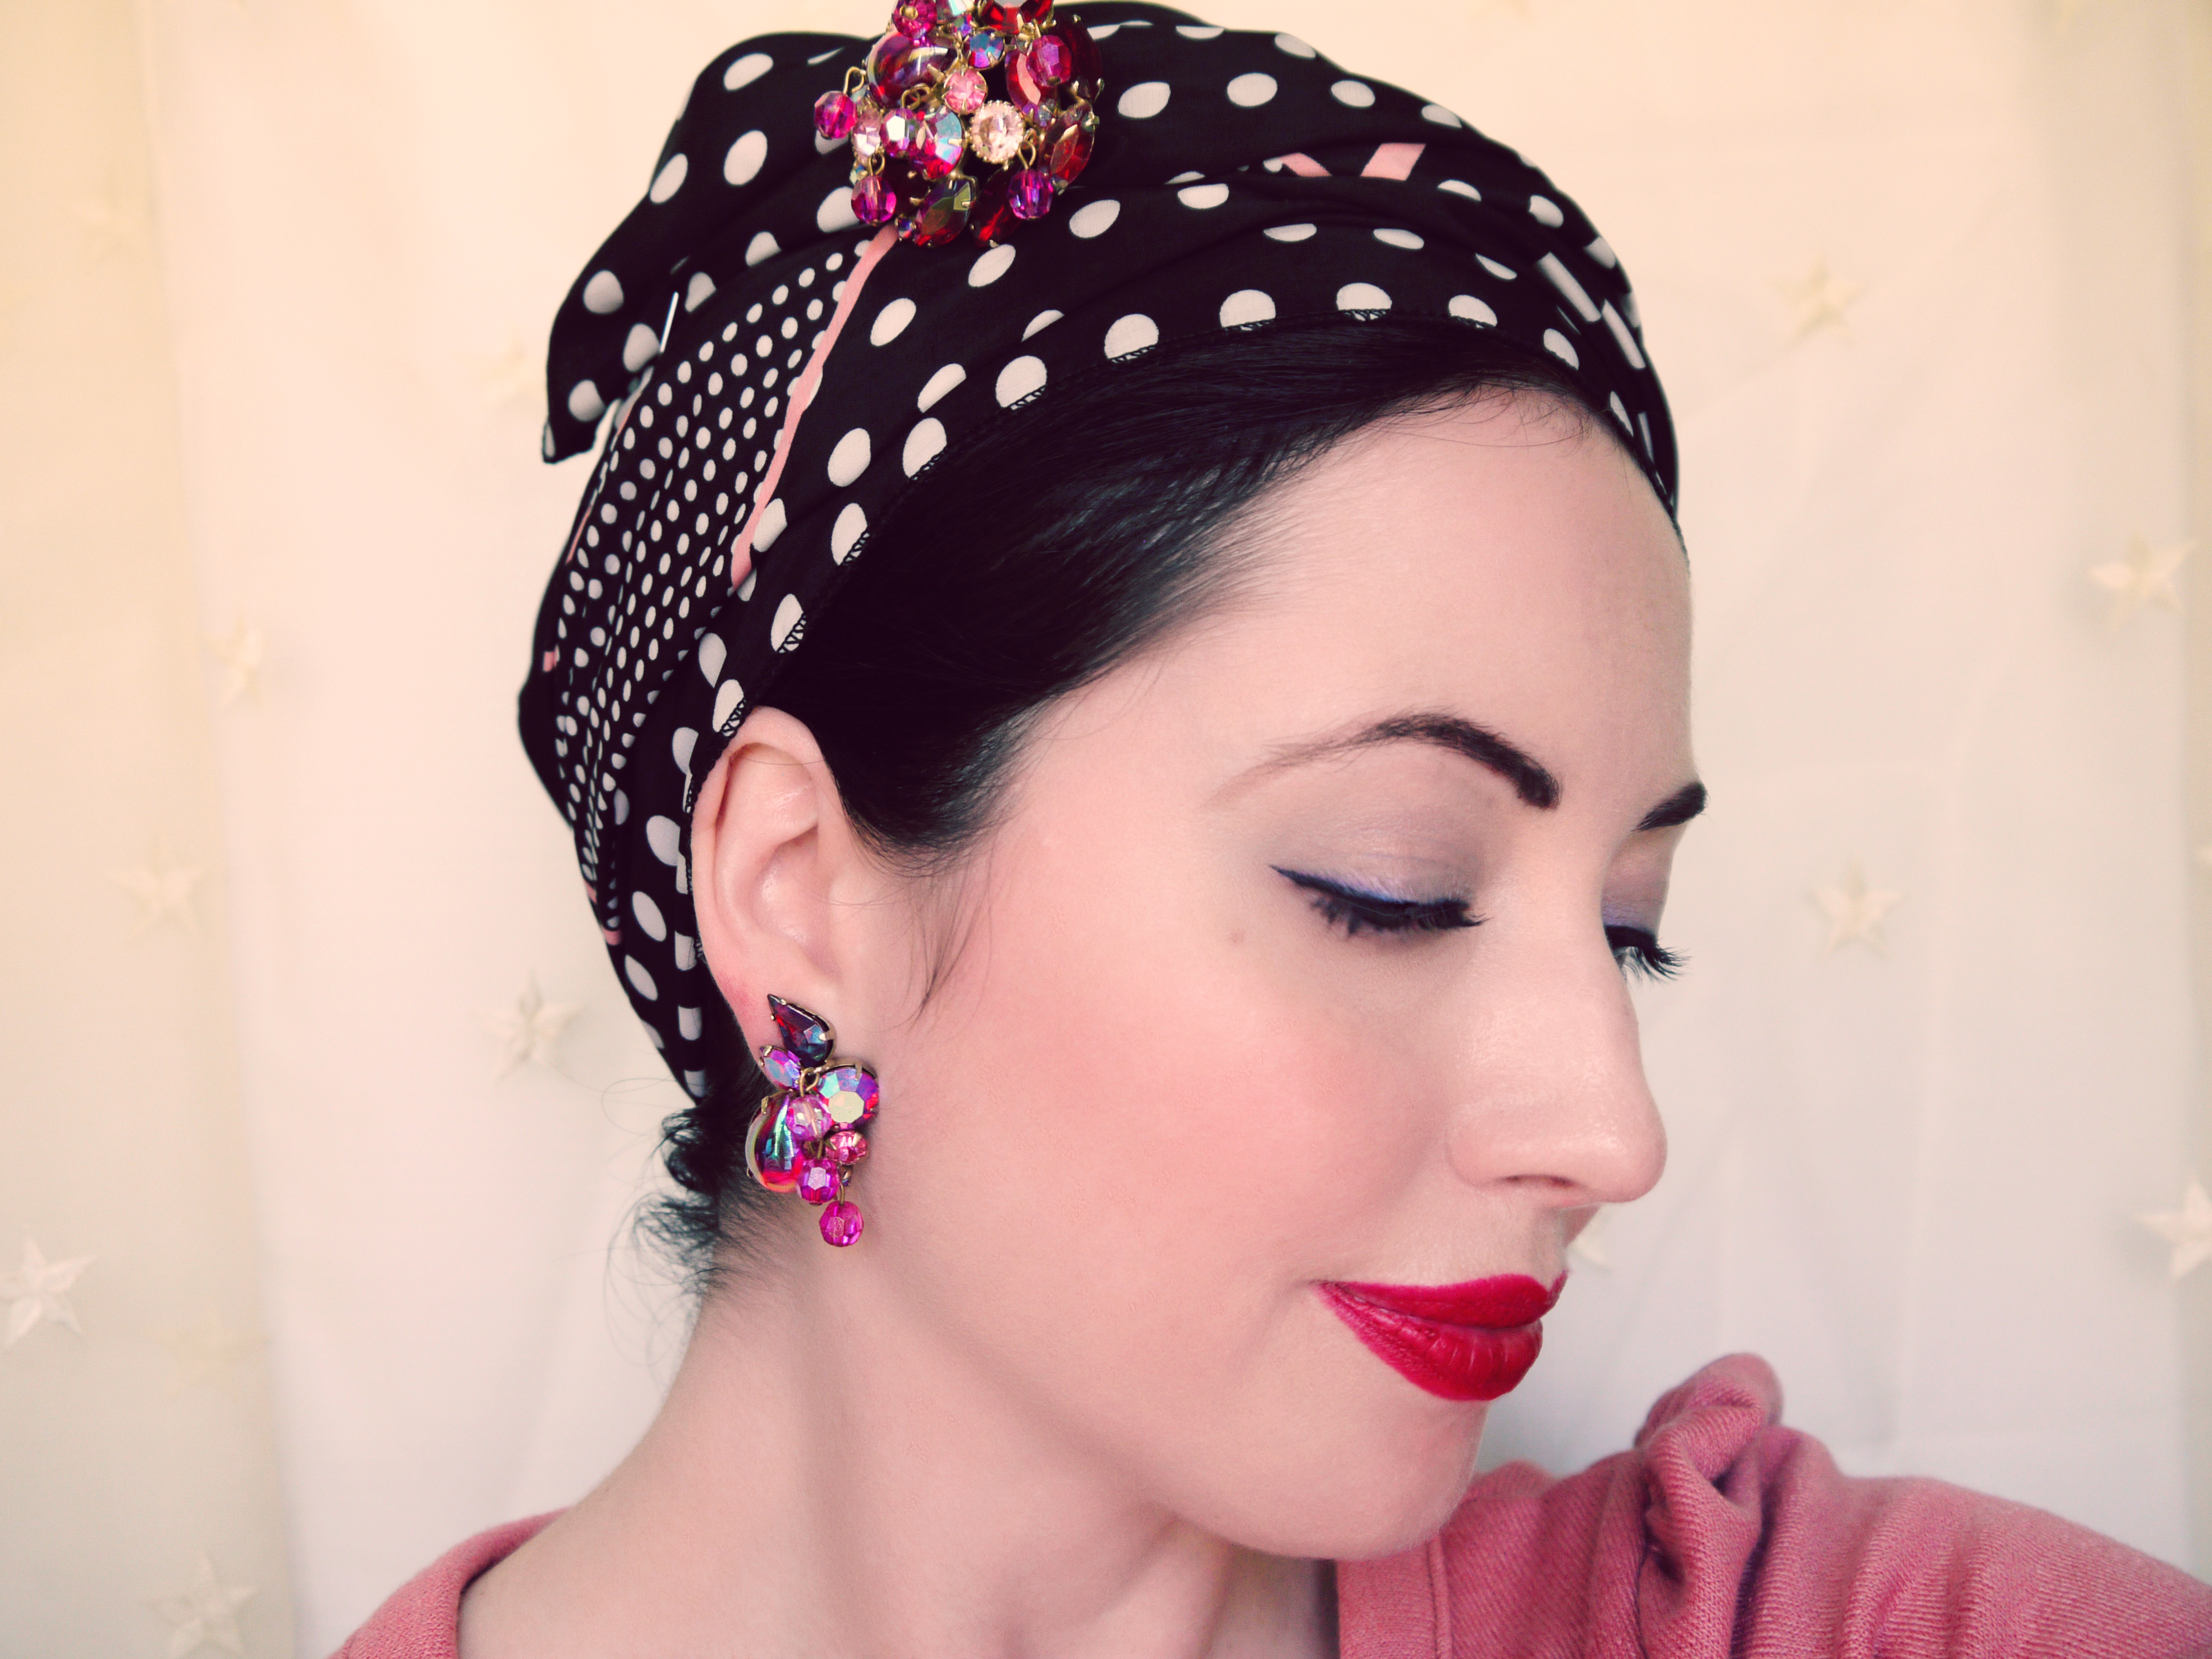
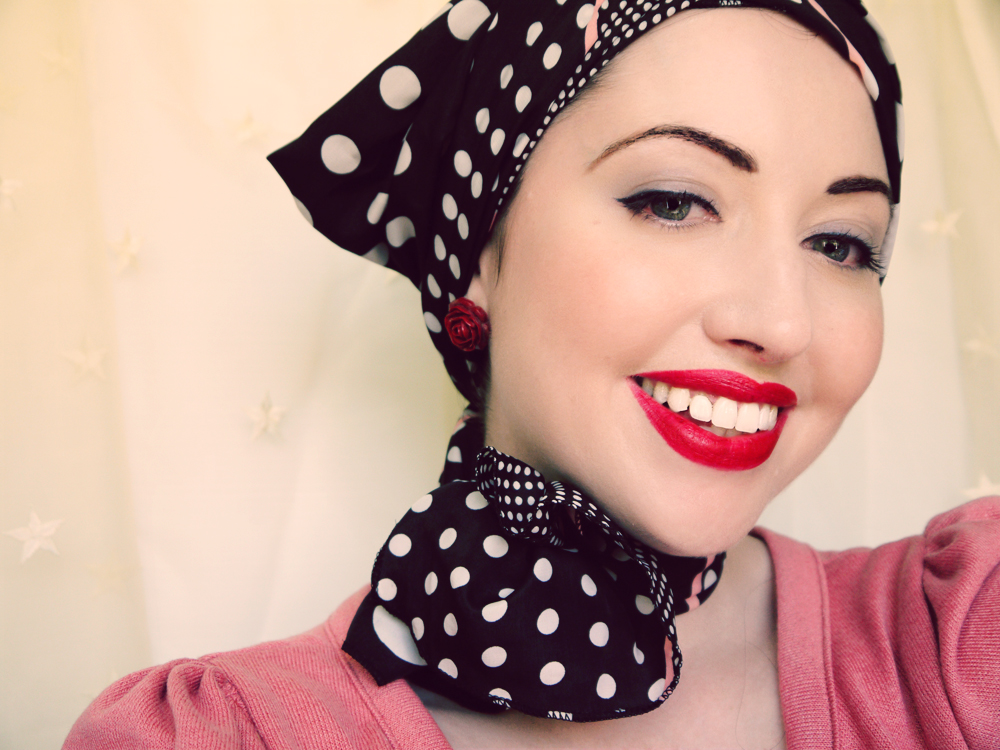
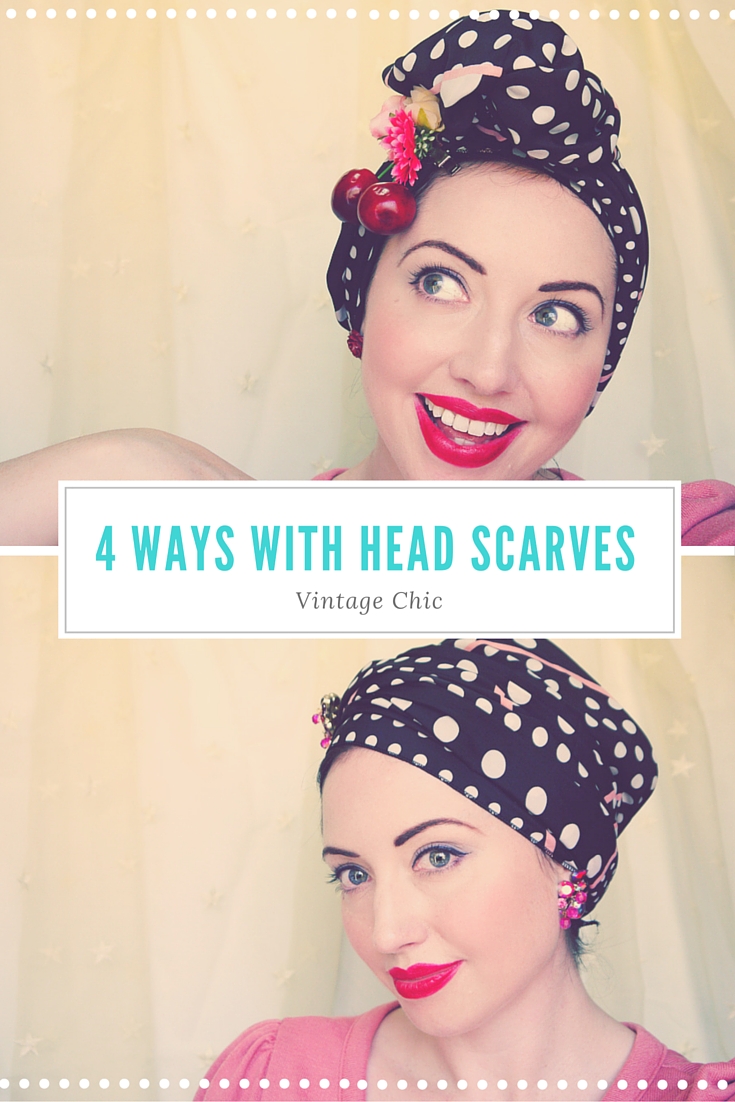
With our Melbourne Sumer currently hitting temperatures of 41 degrees Celsius, this heat inspired me to create some new looks that keep your hair totally out of the way.
I’ve created this tutorial especially for those of you who are looking for headscarves that completely cover the hair, so it is perfect for those with hair loss and doesn’t rely on the scarf being pinned into the hair.
Each of these looks was inspired by different hats from various eras; a 1930’s turban, a 1940’s beret, a 1950’s headscarf and neckerchief, and a 1960’s pill box hat.
After a few hours in front of the mirror with my trusty long scarf, a few dress makers pins, jewellery for accenting and even some hair clips; I’ve created some truly new and unique ways to wear your scarves.
And don’t worry if you don’t have one this big. Simply drop into your local fabric store, choose a pattern you love and ask the staff to cut it to the same dimensions.
The scarf I’m using in this demonstration is a long scarf I bought when I was in a bind at the airport, having misplaced my sweater, and needing something to work as a wrap too.
Dimensions – 67cm wide x 174cm long or 26.5 inches wide x 68.5 inches long.
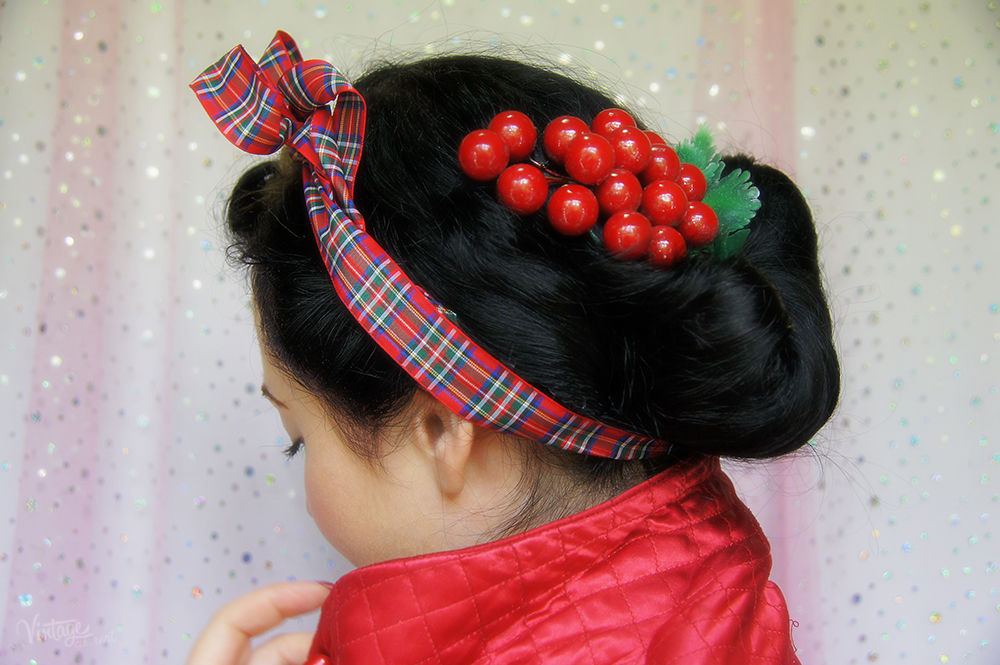
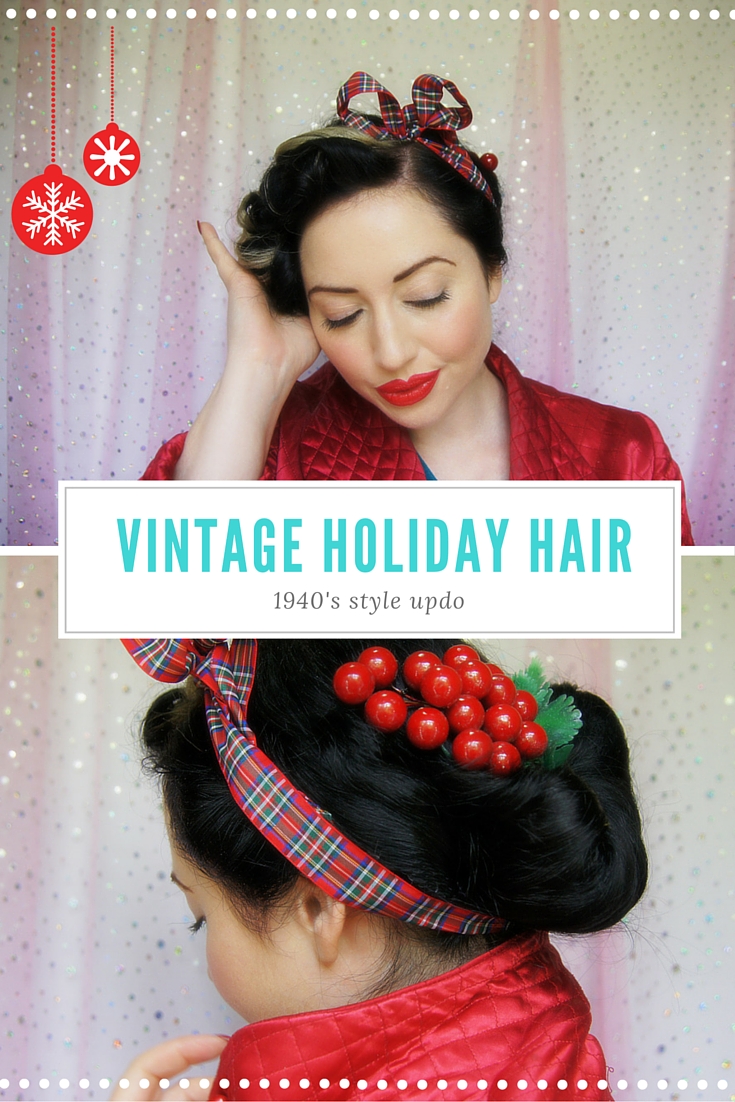
Here’s the perfect vintage hairstyle for Christmas – our summer holiday season!
Christmas in Australia is often during the hottest part of the year, so choosing the right hairstyle to keep you cool and chic is an integral part of putting your look together.
This is a cute 1940’s hairstyle that involves pin curling and a roll at the nape of the neck. I’d suggest this as an intermediate skill level, or one you want to try a few times before the big day. It takes about 1 1/2 hours to do, simply because the pin curls need to dry in the middle of it. So this isn’t a last minute before you leave hairstyle either.
You could choose to skip the pin curl setting and shave off a heap of time by using a curling iron for those sections if you want to.
You’ll see for my Christmas theme I’ve used tartan ribbon and a (ridiculously oversized) holly at the back, but of course you can substitute these for the ornaments of your choice. In fact I quite like the idea of adding bells, but it may drive you crazy…
If you do decide to give this one a whirl, let me know how you go and maybe even share pictures of your ‘do’ on Instagram with me!