You waited a bit too long, right? Distractions, obligations, hectic schedules … trust me, I completely understand.
Now Valentine’s Day 2016 is well and truly upon us, and many of us are scrambling for the best last-minute gift ideas possible (while pretending we had these planned for weeks).
Fortunately, in our search for creative, clever and unique ideas, we found five brilliant gifts, nearly all of which you can create yourself.
So even if you happen to be reading this on the morning of February 14, you’ve still got great gift options. (After that, you’ll want to bookmark this post for next year.)
DIY & Homemade Valentine’s Day Gift Ideas
1. Create Your Own Video Valentine’s Day Card
You’ve got a bunch of photos of and with your valentine, but standard prints aren’t a very creative gift. A photo album is a nice step up, but why not go a bit further and turn your still images into a short, animated movie clip with a sweet soundtrack of your choosing?
Combine photos, video clips, text and music to create your own HD video with Animoto. It’s super easy to use — no video experience required — and with plans starting at $13 per month, you might want to use it for other projects (birthdays, holidays, who knows).
We love this idea from the Find Joy in the Journey blog. You can keep it simple or go all out and plan your dates in detail, depending on your time and brainstorming energy.
The basic version: Pick one day per month for the rest of the year, plan your romantic activities and itinerary, lock them into your calendar and present your list of ideas in any number of creative ways. Reservations to restaurants, gift cards, tickets to events, day trips or nights in — the possibilities are endless. You can adjust days later if needed.
Are you or your partner old enough to remember the magic of the ViewMaster?
If so, you’ll love RetroViewer, a photo viewer modeled on the red plastic classic with spinning photoreels. You can now build your own reels from your photos, customise your viewer and buy gift cards to share the joy. RetroViewer sets start at $30 USD and they ship worldwide.
While you won’t receive this set in time for Valentine’s Day now, we suspect your partner will be so jazzed they won’t mind waiting a bit longer!
4. Trump the Boring Card with Invisible Ink Love Notes
It’s 2016. Who still wants to get a mass-produced Hallmark card, with sappy sentiments that are generic and impersonal?
Your partner can decipher the messages simply by holding them close to heat (near a cozy fireplace or scented candles, perhaps?). And you can handwrite the note with any number of implements, from a paintbrush to a Q-tip.
Warning: Emptying a bottle of wine or spirits to help house these notes may affect your handwriting. Proceed with caution.
5. Make Fresh Roses from Bacon (Yes, Bacon!)
Must we even elaborate on the deliciousness of this idea?
I’ve been a keen op-shopper for so long I can’t even remember when I first started.
I have clear recollections of an original pair of Winkle Picker shoes in all their pointy, polished glory, making their way home with me and into regular rotation until their seams gave out.
There was a 1960’s leather trench coat with pencil pleating I scored for the grand sum of $10 and the multitude of tweed skirts I’d buy to emulate what I imagined was the feeling of a girl going of to boarding school. (I was obsessed with Girl’s Own Annuals at the time.)
When the money I had was only a tiny bit of pocket change, I’d unknowingly begun to develop my own fast money tips.
It has been a life time’s habit, one that did not always make me popular and certainly well before the term “vintage” ever entered our vernacular. It was just how I did things.
Fast forward more than thirty years later and I’m still at it. A habit which I attribute many of my keen shopping skills to, to say nothing of my money saving ways.
I realised recently just how much cash I save every year by choosing to make the op-shop my first port of call for many of my regular buys, things I would rarely, if ever, pay retail for.
Op shops are an absolute gold mine. Even now that many have put their prices up to much higher amounts in certain areas, there are still bargains to be had.
If you want to save cash quickly and regularly, these top 5 buys might just be the baby steps you need to set you on the right path.
Solid, stable frames with no fractures at the joints
Frames with matting still intact
No cracks in the glass
How to fancy them up:
Spray paint
Gold or silver foiling
Glitter glue bath
*Hint: Check out this stunning transformation and DIY instructional from DreamGreenDIY. I’m in love![/dt_vc_list][dt_gap height=”10″][vc_single_image image=”15821″ alignment=”center” border_color=”grey” img_link_target=”_self” img_size=”large”][dt_gap height=”30″][/vc_column][/vc_row][vc_row][vc_column width=”1/1″][dt_vc_list style=”1″ dividers=”true”]
Tupperware and other storage containers
What to look for:
Matching lids with no warp and a tight seal
Plastic that hasn’t suffered any melting or microwave burn
How to fancy them up:
Vinyl stickers or labels as DIY decals
*HINT: search for Meyercord Decals to find original vintage decals![/dt_vc_list][dt_gap height=”10″][vc_single_image image=”15818″ alignment=”center” border_color=”grey” img_link_target=”_self” img_size=”full”][dt_gap height=”30″][/vc_column][/vc_row][vc_row][vc_column width=”1/1″][dt_vc_list style=”1″ dividers=”true”]
Serving ware
Pyrex, casserole dishes, silverware (plated or otherwise)
What to look for:
No pitting in the plating as this will quickly lift or corrode
No cracks or major chips
Matching lids
Matching sets or complimentary colours
How to fancy them up:
Silver or metal polish – easy to use and makes a big difference to the overall appearance.
Glass or china wear decals
*Hint: Check out this fantastic post by Dans leTownhouse on restoring and cleaning pyrex[/dt_vc_list][vc_single_image image=”15815″ border_color=”grey” img_link_target=”_self” img_size=”large” alignment=”center”][dt_gap height=”30″][/vc_column][/vc_row][vc_row][vc_column width=”1/1″][dt_vc_list style=”1″ dividers=”true”]
Timber Furniture
What to look for:
Sturdy legs – no cracks or loose joins
Well running drawers (these can also be fixed with a good sanding and a bit of baby powder if they stick)
How to fancy them up:
Spray paint – enamel auto spray paint is a cheap buy and gives a great finish. Just make sure to sand properly in between coats
Re-upholster – often very simple of timber furniture with upholstered seats.
Add moulding panels
*Hint: This impressive timber stool makeover from The Red Thread blog has total DIY instructions.[/dt_vc_list][dt_gap height=”10″][vc_single_image image=”15817″ alignment=”center” border_color=”grey” img_link_target=”_self” img_size=”full”][dt_gap height=”30″][/vc_column][/vc_row][vc_row][vc_column width=”1/1″][dt_vc_list style=”1″ dividers=”true”]
Cushions & Throw Pillows
What to look for:
Size – does it fit the purpose you have in mind
Overall condition – cleanliness
Don’t worry about the cover or pattern, you can make you own later
How to fancy them up:
Make your own cushion covers
Add fancy trim, like fringing or braiding to the existing cushion cover
Add buttoning for a more expensive look
*Hint: This Spotlight tutorial has the instructions on how to make DIY cameo or silhouette cushions[/dt_vc_list][dt_gap height=”10″][vc_single_image image=”15820″ alignment=”center” border_color=”grey” img_link_target=”_self” img_size=”full”][dt_gap height=”30″][/vc_column][/vc_row][vc_row][vc_column width=”1/1″][vc_column_text]These are some of our most shopped for decorator items and sometimes the dollars add up very quickly.
If like me, you prefer to save your money and invest it elsewhere (like paying off bills or supporting local artisans and buying handmade shoes), these tips will set you on the right path.
It’s a healthy habit to get into both for your wallet, the environment and for the creative part of your brain that gets a chance to flex its muscle.[/vc_column_text][/vc_column][/vc_row][vc_row][vc_column width=”1/1″][vc_single_image image=”15808″ border_color=”grey” img_link_target=”_self” img_size=”large” alignment=”center”][/vc_column][/vc_row]
Sewing and DIY projects have fallen way down my list of priorities in the past year. I’ve been on such a decluttering and purging streak that the urge to create had been hiding. Now, with the clutter gone, systems streamlined and a much clearer head, I’m looking at my long shelved projects with new eyes.
Thankfully I didn’t purge my stash of beautiful vintage patterns in the clear out, and their time has finally come. There’s likely to be a bit of dust to brush off my skills, so I’m starting slowly and diving into the delightful rack of restorations I’ve been meaning to work on.
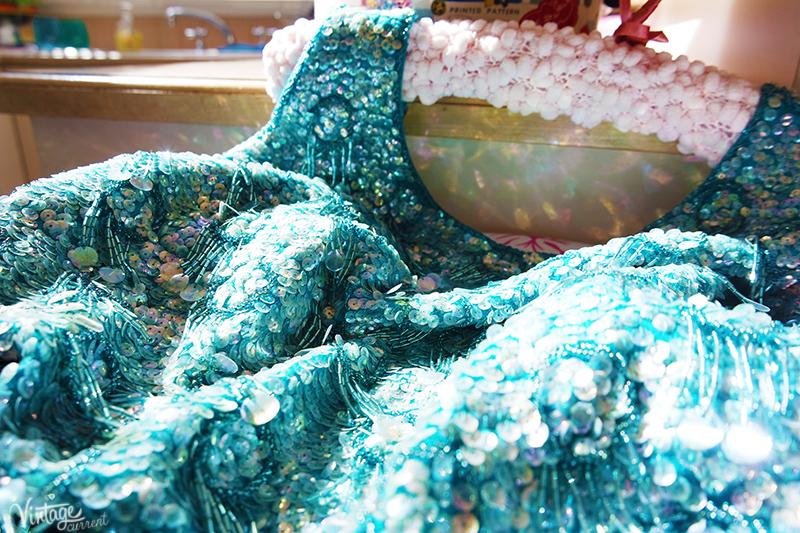
I bought this amazing 1960s sequinned top in Los Angeles over four years ago and haven’t taken the time to replace the silk lining; until now. While I was looking in the wardrobe for spring outfit inspirations and feeling the need for a bit of glitter, this little number was unearthed.
I love the way the shine ripples off this blue like waves, throwing a rainbow of colours back at you. The bright morning light made it even more beautiful.
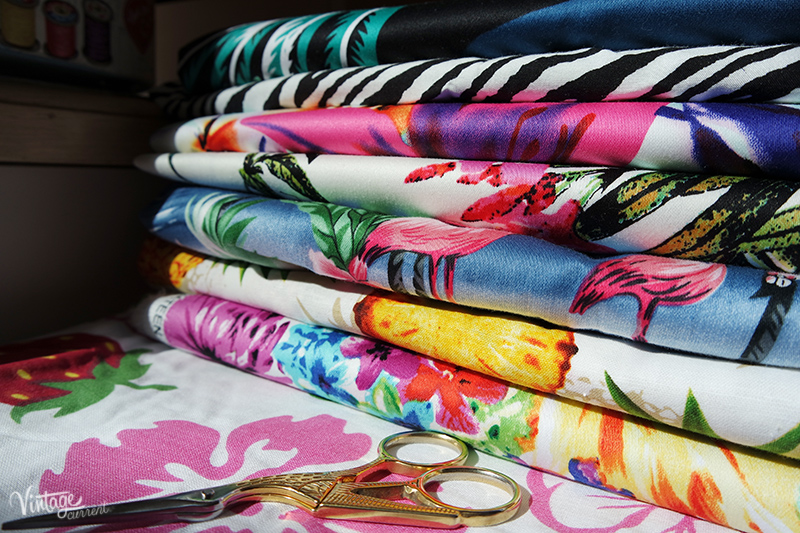
It isn’t just the spring sunshine that has me inspired to bust out the sewing machine again, but all the new fabrics from Spotlight! I’m incredibly grateful that they gifted me this little stash with the instructions to give it a fabulous life. Ummm.. yeah!
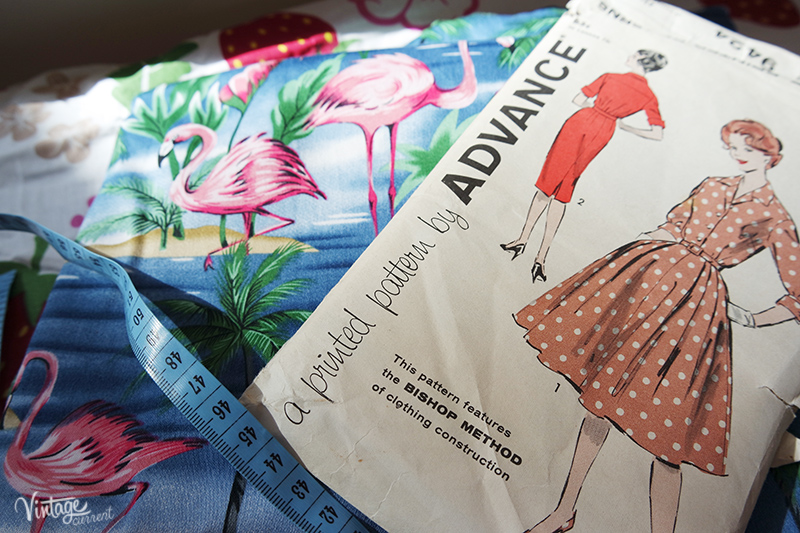
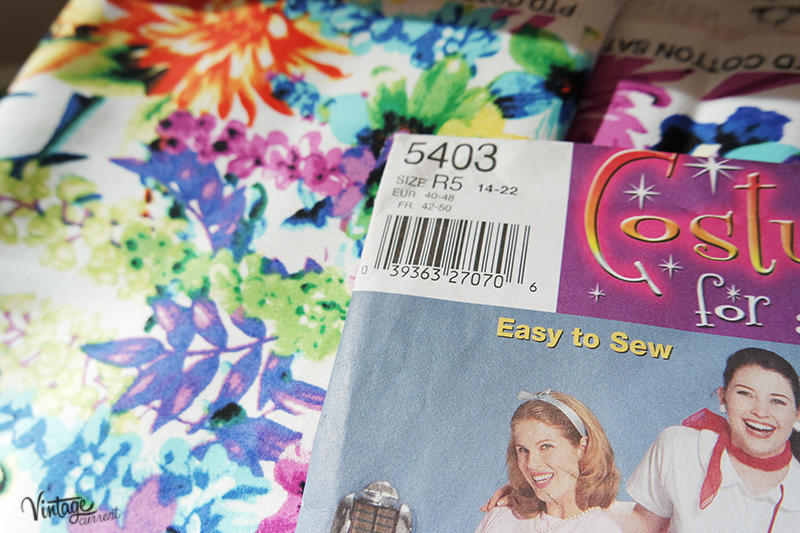
If you’ve been following my Instagram you’ll have seen the pains I was in trying to decide which fabric to make this beautiful vintage shirt-waister pattern in. While the feedback was pretty much a spilt between the two, with many voting for me to make it in both patterns, I’ve decided to first tackle the flamingo print, then move towards the pineapple print for summer.
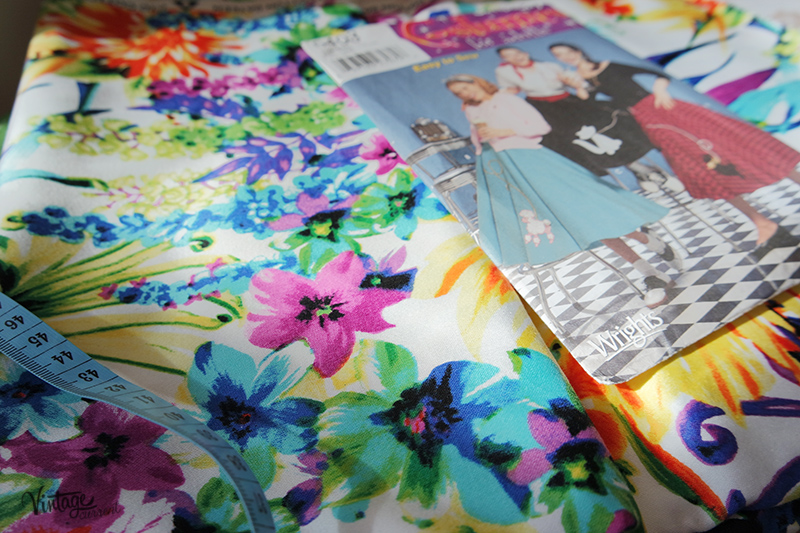
I have to give myself plenty of time to get this done though, as rushing a vintage pattern can be disastrous. Measure twice, cut once. I was super keen to get started on this project but determined that the safer route was to start with the restorations, then move onto knocking up some new circle skirts in these stunning spring florals.
While I have loads of original vintage patterns for circle skirts in various forms, and again there are loads of tutorials online for DIY versions, without a doubt, the most simple way to make one of these is with this costume pattern from Spotlight.
If you can ignore the super cheesy images on the cover and get over the fact that they are in the “costume” section (we vintage lovers are easily offended when our daywear is referred to as a costume), you’ll have yourself the best go-to pattern in your range.
Having a group of friends, both virtual and real, who inspire me with their prolific ability to create, has made a huge impact on my motivation. The Facebook group where everyone shares their successes and failures is hugely helpful in keeping your projects in perspective, as well as getting the odd piece of advice or just venting at our tools.
We all share the “problem” of heading out to Spotlight and coming home with more fabric for more projects. I’m trying to stay focused this time around and just buy the little bits I need in their online store instead of jumping in the car and being lost in the rolls and rolls of temptation.
I’m attempting to stay much more organised with my creating this time around, and not allow unfinished projects to become clutter. Instead I’m taking the opportunity to mend and remodel, then determine exactly wear these new fabrics are best used in my wardrobe.
I’d be interested to hear if you have a certain way you approach your sewing and design projects. Is it by pure inspiration or something more strategic? Also, if you have any Pinterest groups you’re involved in and know I must join, please let me know!
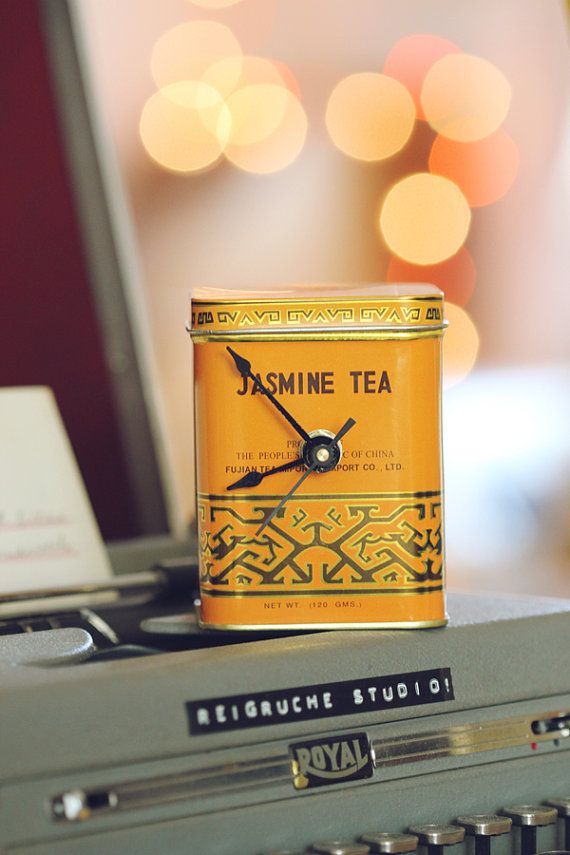
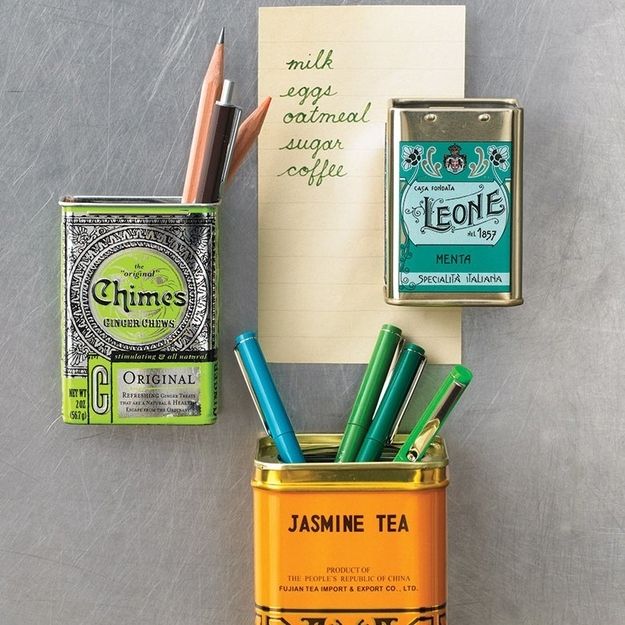
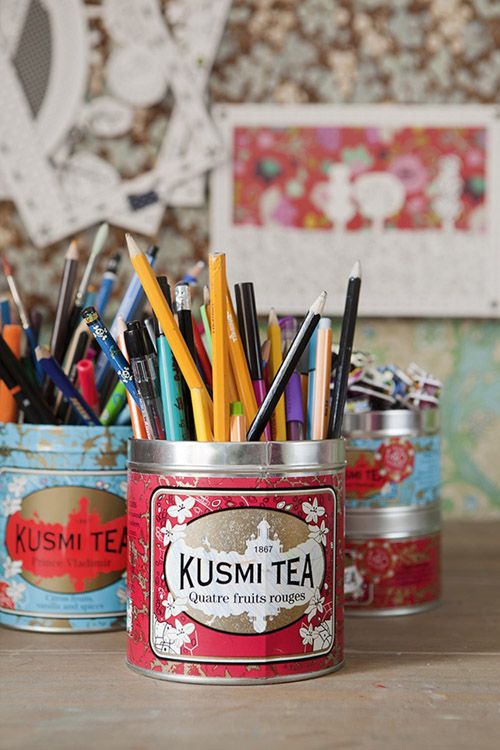
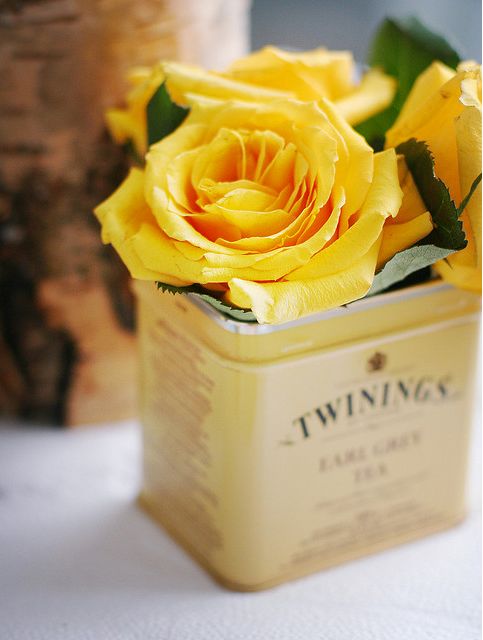
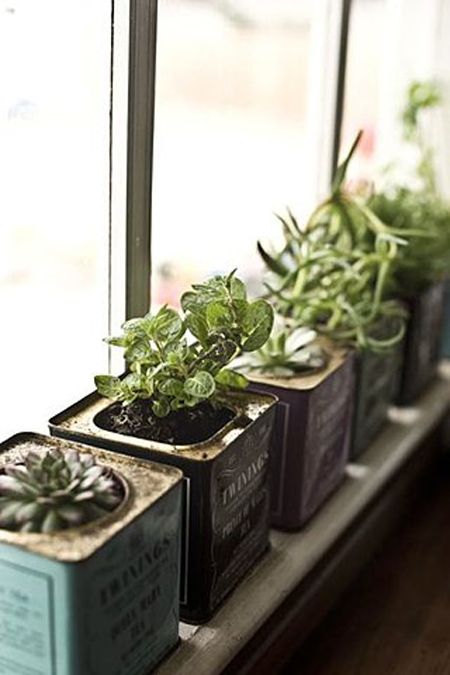
Making your house a home with simple DIY projects is one of the great joys of vintage living.
Taking what is old and giving it new life, imagining possibilities and reviving the story of something that is otherwise forgotten. I have a few tea caddys no longer in service and they have sat prettily on the window sill gathering dust; now it’s time to put them into a different kind of service. With a little love and creativity they can take center stage as you plan your Spring decorating. After all, what could be a more appropriate way to celebrate the coming season than with taking something out of hibernation and giving it a brand new life!
Being at the mercy of anything isn’t a good feeling, and yet everyday I watch on as we become more and more dependent on the market around us. First it started out as marketing services for the time poor, yet gradually the insidious creep of helplessness is engulfing a generation.
It may sound dramatic, but I’m constantly amazed that many of the skills I take for granted have become the realm of specialist or obsessives only. What am I talking about? The simple ability to do things for ourselves.
We’re well aware of the huge resurgence in DIY culture, yet there seems to be some things we see as too technical or scary to do ourselves. Maybe we’ve forgotten how to read instructions, or maybe there’s never been anyone in our close circle to help teach us, but whatever it is I’ll be blowed if I’ll give up learning new things just because buying them is “easier”.
As someone who has a thirst for knowledge and a ridiculously positive outlook on learning, it may come as a surprise that there are some things that still completely mystify me and scare me out of attempting. Like math, arc welding and anything they cook on Master Chef. But knitting, knitting shouldn’t be one.
The number of times I’ve poured over vintage catalogues and wished I could Buy It Now, or purchased beautiful knitting patterns to drool over are too many to count. I have made several failed attempts at knitting in the past, ending up with rather (let’s just say) organic looking pieces rather than what I had in mind. When I consider all the things I’ve taught myself to do, drafting patterns from vintage clothing, web design and even learning Chinese, why oh why does knitting scare me so much? Frankly it is madness and I’m tired of being at the mercy of my wallet when it comes to satisfying this wardrobe want.
So I have started knitting again.
So far so good. It is all on the needles and all the stitches are there. I’ve joined up on Ravelry and a few Facebook interest groups. I’ve bought a stash of needles from Savers and I may even make a bag for it all this week. (Every new hobby must have all the applicable accessories around here, it’s like a family rule.)
I am determined to master this skill, I just have to stick to it and not completely crack it each time something fails. And if I keep going like this adding to my extremely diverse set of life skills, I may yet be ready in time for the Zombie Apocalypse.